Story Studio
Located on the second floor of Roesch Library, the Story Studio is a streamlined media production studio for recording and editing video and audio projects. All you need is a USB flash drive to get started.
Don't know how to set up cameras, lights, touch screens, or microphones for high quality video? Don't worry. The Story Studio will handle that automatically so you can focus on creating a compelling media project. Visit the Story Studio LibGuide for details about how to access and use the studio.
UD students, faculty and staff can reserve the Story Studio, Room 232, and the adjacent computers. Check availability and make a reservation online.
Why Teach and Learn with Video?
The Story Studio is outfitted to meet the need for video presentation projects on campus. Communicating through video can encourage creators to synthesize information and impact their own understanding of a topic. Here’s a list of suggestions and tips from University Libraries and the Center for Online Learning:
- Practice. Practice recording a few times to get familiar with the space and to identify things about your presentation you might improve for the final project
- Write a script. Prepare what you are going to say in advance so that you can be clear and concise in your recording
- Consider your audience. Think carefully about who your potential viewers are and what is most important to convey to them. Then tailor your content and communication style to that audience
- Keep it simple. If possible, keep your recordings to 10 minutes or less. If your content demands more time, consider breaking up your material into multiple shorter recordings
- Dress accordingly. Consider wearing clothing that is appropriate for a business or academic audience, and select clothing that contrasts with the background so that you stand out from any content on the display behind you
- Smile. Look directly at the camera when speaking and don't be afraid to smile. A natural smile will help you appear more relaxed and engaging.
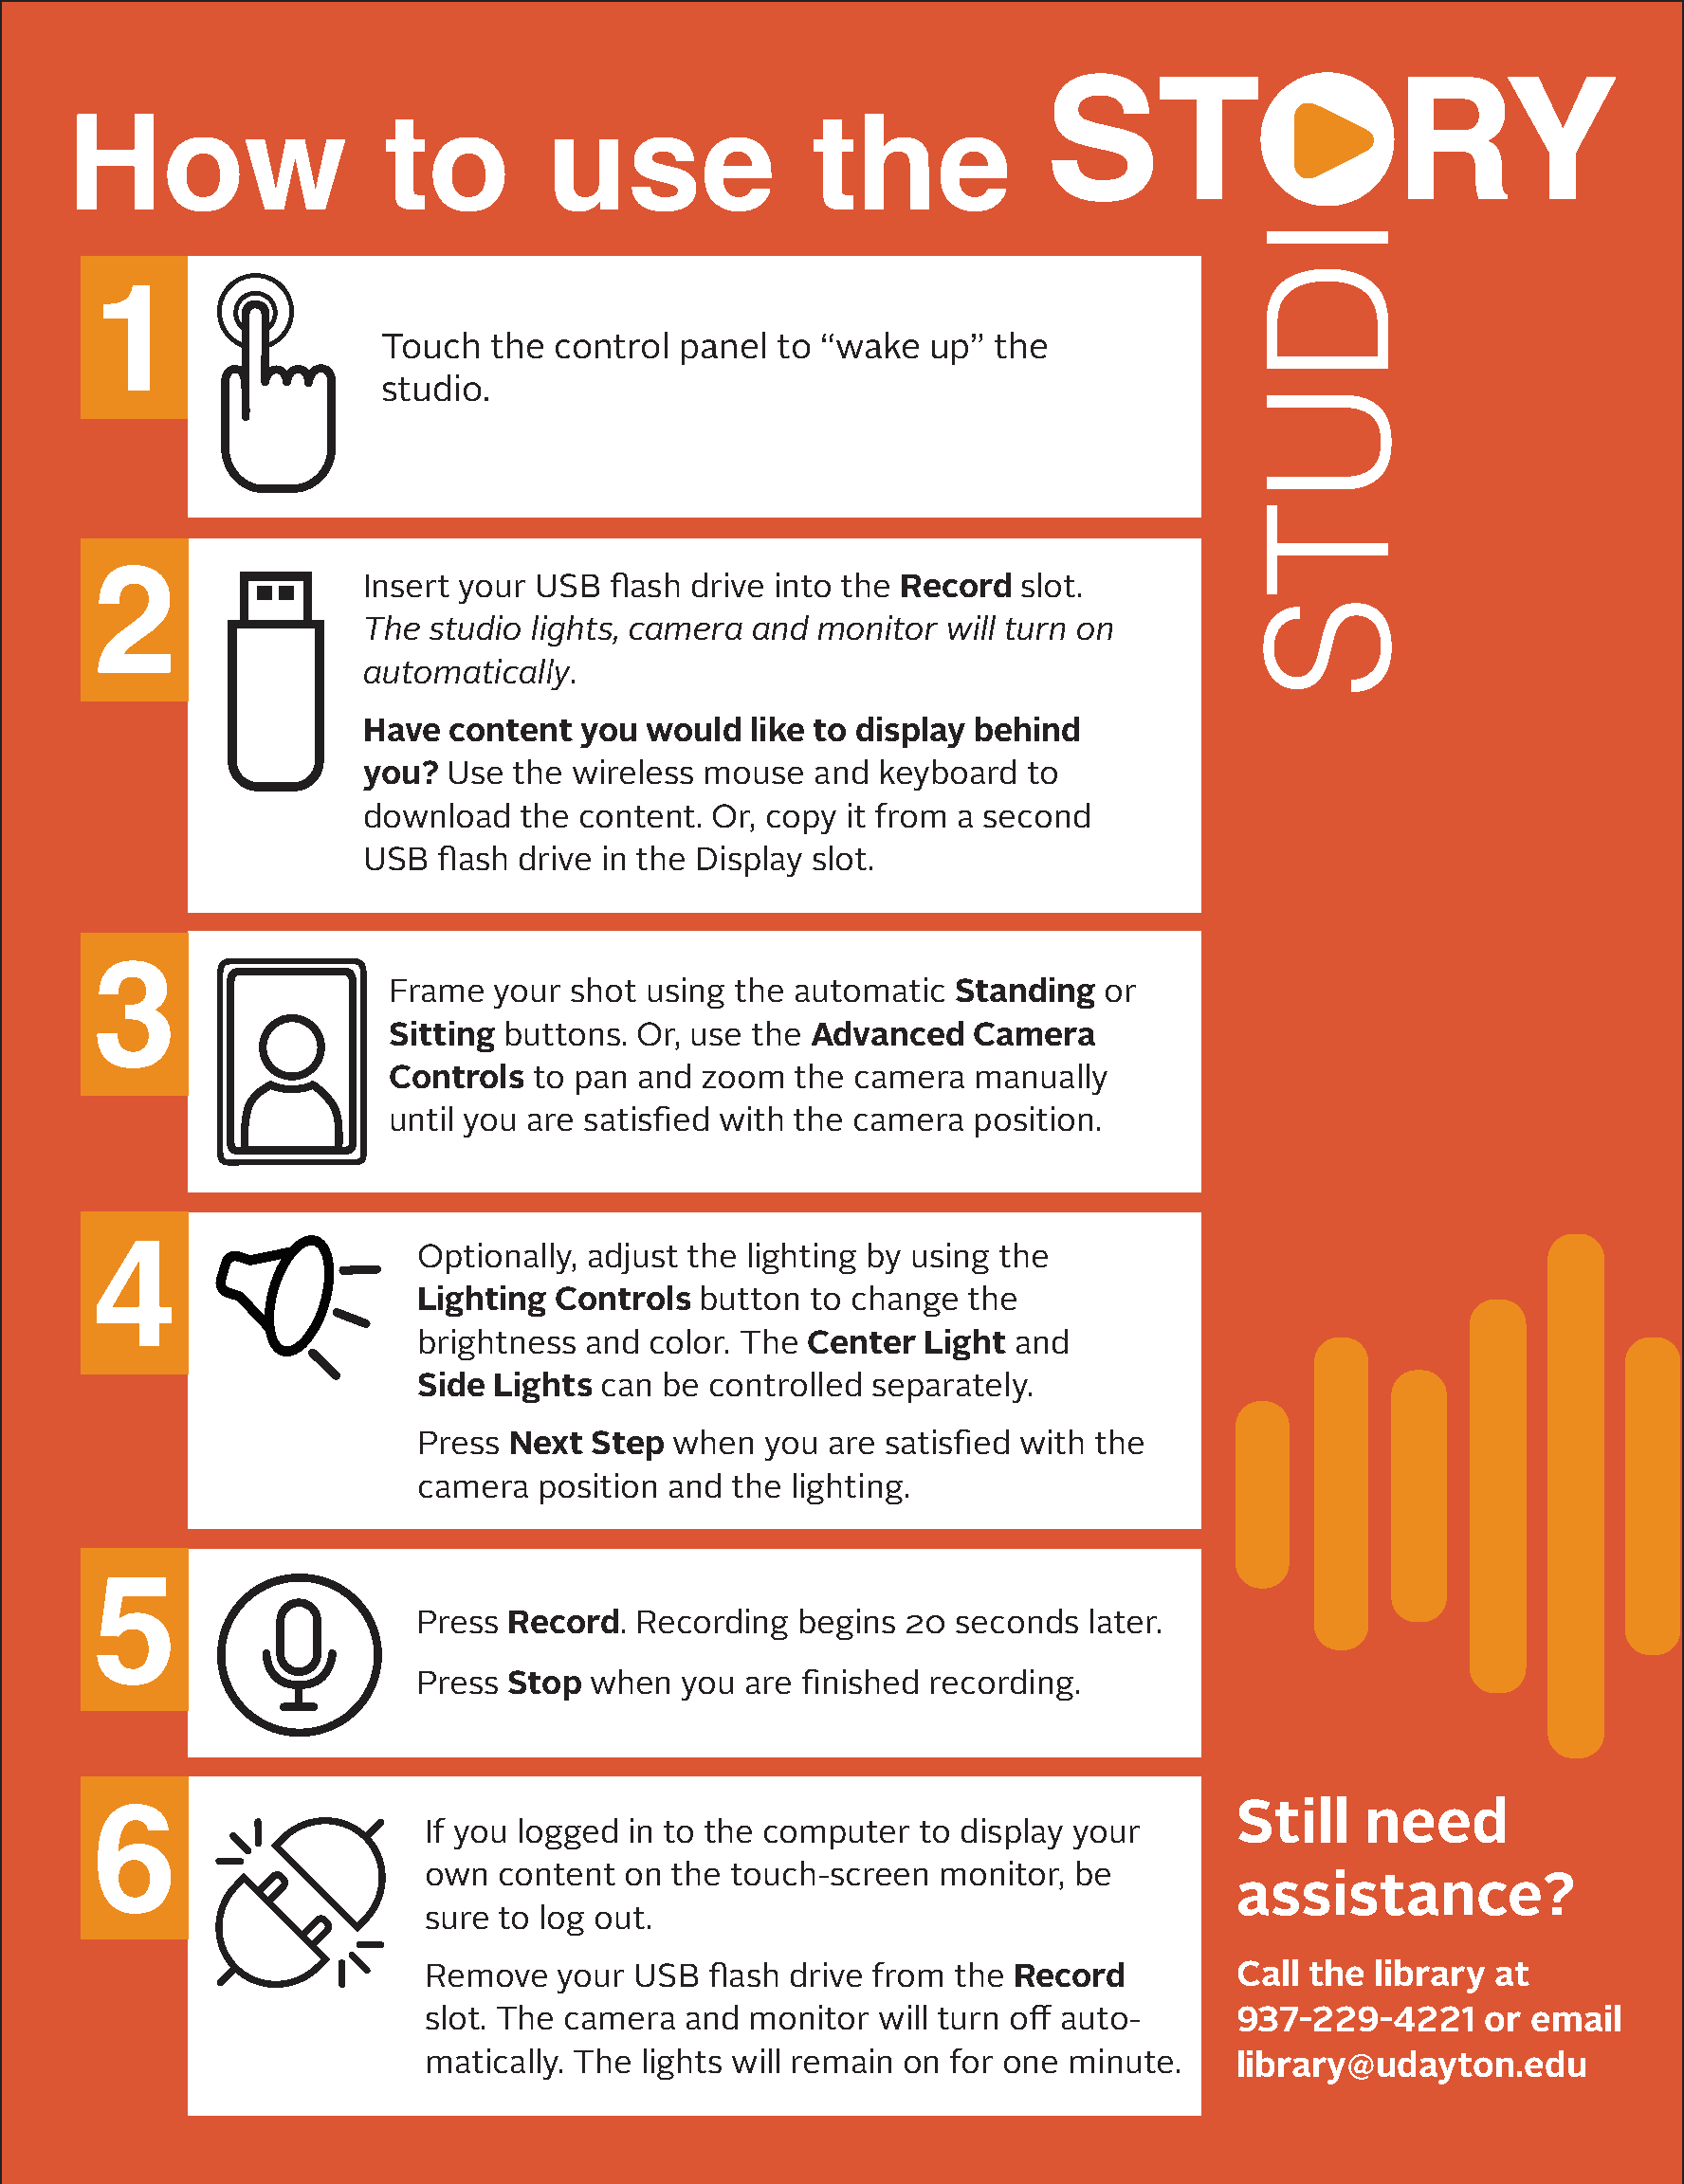
How to Use the Story Studio
- Touch the control panel to wake up the studio. Then touch the Record button.
- Insert your USB flash drive into the Record slot. The studio lights, camera, and monitor will turn on automatically. If you have content you would like to display behind you, use the wireless keyboard and mouse to download the content online, or copy it from a second USB flash drive in the Display slot. Then touch Next on the control panel.
- Frame your shot using the automatic Standing or Sitting buttons. Or, use the Advanced Camera Controls to pan and zoom the camera manually until you are satisfied with the camera position.
- Optionally, adjust the lighting by using the Lighting Controls button to change the brightness and color. The Center Light and Side Lights can be controlled separately. Touch Next Step when you are satisfied with the camera position and the lighting.
- Touch Record. Recording will begin in 20 seconds. Touch the Stop button when you are finished recording.
- If you logged into the computer to display your own content on the touch-screen monitor, be sure to log out. Remove your USB flash drive from the Record slot. The studio lights, camera, and monitor will turn off automatically.